Showing posts with label Karin Markers. Show all posts

Tuesday, February 22, 2022

Hero Arts Double Duty


Here we are!  This is the 14th month, so we are into year #2.  This was a thought that I had in the middle of the night, similar to what Kelly has had in the past.  Plus, it is a bit of offshoot of our Stamp What Challenge! This one is called Double Duty! 


Each month, we get to pick a stamp set from a predetermined company. Then, we will use that one stamp set and make two cards from the set.  Different images and sentiments from the same set can be used, or use the same image two different ways—Double Duty either way!  But, as an added challenge, one item must be used on both cards—same color cardstock, same ribbon, same stencil, same something.  Double Duty Again!  We will post both cards on our blog on the the 22nd of each month.  See-Double Duty again!  We will be sure to have fun getting doubly inky each month with a different stamp company.  Let’s have fun!

For February, the company we are using is Hero Arts--a company  that has been around for a very long time and one that all of us have a few sets to chose from.  I picked a very cute stamp and die combo called Bunch of Balloons.   


For my first card-the black one, I embossed black cardstock with white embossing powder. I then die cut the image with the coordinating die. I then used my Karin Deco Brush Metallic Marker to color the balloons.  I will admit, it did not turn out the way I thought--looks a bit like a hot mess............  I added two layers behind the image for some dimension. The background patterned paper is from a pack of Party Brights from Our Memories for Life.  Some Stampin' Up rhinestones are the final touch.  


For my second card, the white one, I also embossed the image with white embossing powder.  I then used some Taylored Expressions inks along with my blending brushes to blend in rainbow colors.  I then die cut the image and layered it over a die cut panel that was embossed with my Stampin' Up Pinewood Planks embossing folder.  Again, I die cut addition images and placed them on top of each other.  The sentiment is from the same stamp set and was cut with 3 Stampin' Up punches.  Again, rhinestones were added for the final touch. 


I had a number of Double Duty elements on these cards. 


I hope you enjoyed my card for our group.  Please be sure to check out the other Double Duty cards.  Here is a link to  Jeanette's,  Darlene and Carol's blogs.    I am sure you will not be disappointed and will see a couple of sets of great cards.  Our friend Kelly might occasionally post a card for our challenge, but she could not commit to the entire year.  So, check her blog to see if she did play along this month!

Pinkfresh Studio is up for our our March challenge, so be sure to check out our cards on the 22nd!


Image/Sentiment:  Hero Arts Bunch of Balloons stamp and die set

Cardstock/Patterned Paper:  Stampin' Up Basic Black; The Paper Cut Cougar Opaque 110# White; Our Memories for Life Party Brights 

Ink:  Hero Arts Intense Black; Versamark; White Embossing Powder; Taylored Expressions Ink Cubes

Accessories:  Karin Deco Brush Metallic Markers; Stampin' Up Rhinestones


Wednesday, November 3, 2021

Two for One + Twelve


These are two cards I made for my One Plus Twelve card for November. This was the brainchild of Kelly and she asked Jeanette and me to join her in this challenge in 2019. We are to use just one stamp, to make a card every month and post on the 3rd of each month.  It was so much fun that the three of decided to continue for our third year and pick a new image to use.

For 2021, I picked a Gina K Designs set called Thankful Greenery.  I think this set is so pretty and I can see in my mind many ways that I can use this image.  Plus--I will have 12 thank you cards at the end of the year!

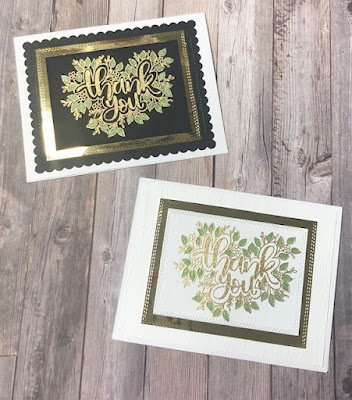
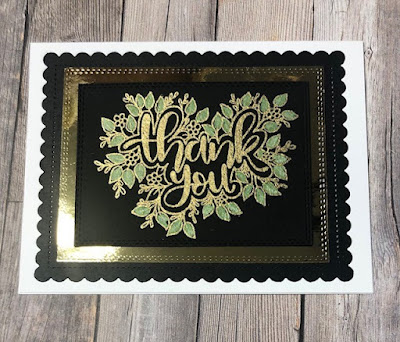
For this month's cards, I stamped the image with Versamark on both white and black watercolor cardstock. I then heat embossed both panels with Gold embossing powder. I took out my Karin Deco Brush Metallic Markers and colored just the leaves on both panels.  I then die cut the panels with my CottageCutz Double Stitched Rectangle Dies.  I also die cut another layer from the next larger die from the same set of The Paper Cut's Gold Mirricard--love the shine from it!     


The white panel was layered on a background embossed with my favorite Embossing Folder--Stampin' Up's Subtle Dynamic.


The black panel was layered on another die cut from the MFT  Blueprints 20.


I love the gold and green combo along with the layers in these cards!


Please be sure to check out the other One plus Twelve cards.  Here is a link to Jeanette's and Kelly's blog. I am sure you will enjoy checking out what stamp set each of them picked for 2021 and will see a couple of great cards! I hope Kelly and Jeanette like my card and that you might too! Be sure to check back every month on the 3rd to see our cards!

Image/Sentiment: Gina K Designs Thankful Greenery

Cardstock:  The Paper Cut Cougar Opaque 110# White, Gold Mirricard;  Stampin' Up Basic Black; 

Ink:  Versamark; Gold Embossing Powder; Karin Metallic Deco Brush Marker

Accessories:  My Favorite Things-MFT Blueprints 20 Die; CottageCutz Double Stitched Rectangles; Stampin' Up Subtle Dynamic Embossing Folder


Monday, July 6, 2020

Another Karin Marker Card


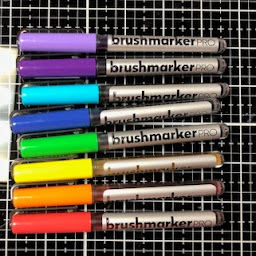
This is the second card I recently made using my new Karin Brushmarker Pro Watercolor Markers.  I am getting more used to them and I love the vivid colors.  
I picked an older Hero Arts wood mounted stamps called Delicate Rose Stems. I stamped the image on Strathmore Watercolor Paper.  This time I scribbled some color directly on the image on the watercolor paper and then used my Aqua-painter to move the color around.  Yesterday I posted a card where I used the same stamp and a different technique and it does look a bit different.  For the background, I sponged Tim Holtz Festive Berries and Worn Lipstick Distress Oxide Inks over the Watercolor Brushstrokes stencil from Picket Fence--seems to be an appropriate stencil to use with these makers!  I also added a doily from Stampin' Up, a strip of green satin ribbon and again a few green sequins add an additional pop of color.  I really like the look of this card!  


Here is the inside of my card with a sentiment from Inky Antics:


Image/Sentiment:  Hero Arts Delicate Rose Stems/Inky Antics Sentiment

Cardstock/Patterned Paper:  Strathmore Watercolor White; Stampin' Up Flirty Flamingo, Granny Apple Green

Ink:  Versafine Black Onyx; Tim Holtz Distress Oxide Festive Berries and Worn Lipstick Inks

Accessories:  Picket Fence Watercolor Brushstrokes Stencil; Karin Brushmarker Pro Watercolor Markers; Green Sequins; Stampin' Up Doily and Green Satin Ribbon


Sunday, July 5, 2020

Delicate Rose Stems


This is a card I made using my new Karin Brushmarker Pro Watercolor Markers.  I am getting more used to them and I love the vivid colors.  I picked an older Hero Arts wood mounted stamps called Delicate Rose Stems. I stamped the image on Strathmore Watercolor Paper and then used my Aqua-painter to pick up color from my markers that I put in a palette.  Tomorrow I am posting another card where I used the same stamp and a different technique and it does look a bit different.  For the background, I sponged Tim Holtz Spun Sugar Distress Oxide Ink over the Diamond Ladders stencil from A Colorful Life Designs.  A few green sequins add an additional pop of color.  I really like the look of this card!  


Here is the inside of my card:


Image/Sentiment:  Hero Arts Delicate Rose Stems/Inky Antics Sentiment

Cardstock/Patterned Paper:  Strathmore Watercolor White; Stampin' Up Flirty Flamingo, Granny Apple Green

Ink:  Versafine Black Onyx; Tim Holtz Distress Oxide Spun Sugar Ink

Accessories:  A Colorful Life Designs Diamond Ladders Stencil; Karin Brushmarker Pro Watercolor Markers; Green Sequins


Thursday, June 25, 2020

Mini Summer Camp Wrap-Up


Today is the final day of our Stamping Sisters Mini Summer Camp.  I am wrapping up the 4 day camp and I sure hope you have enjoyed our classes.  If you have missed any of the days, please go back and check out the three previous tuorials by our awesome camp counselors.


Here are our blogs and the days of being a camp counselor:

Monday/June 22 ~ Kelly @ Sandcastlestamper
Tuesday/June 23 ~ Darlene @ Accordingtobijou
Wednesday/June 24 ~ Jeanette @ Creativeplay
Thursday/June 25 ~ Barb (me!)  @ inkingintoretirement

I am here for our final class and you will need the following items:
  • A stencil-any design works.  
  • Pixie Spray and/or tape is recommended to hold your stencil in place.
  • Watercolor Markers--all four of us recently purchased a set of Karin Brushmarker Pro watercolor markers and I hope they use them today!  I would like you to pick some bright rainbow colors for your card.
  • An Aqua-painter or water-brush
  • A word or image die
  • Watercolor Paper 
  • Cardstock to complete your card
  • Any embellishments you might want to add

First--I sprayed Pixie Spray on the back of my stencil and laid it over my piece of watercolor paper.  Be sure to push down the middle of your stencil so it has good contact with your paper on all parts.


I picked two stencils from A Colorful Life Designs--Bare Rainbow and Heart Fade.  I like the results of the rainbow die better as it has larger open spaces than the smaller hearts. The watercolor will seep under the stencil, so it is a bit less obvious in larger areas. 

Now, pick out any number of watercolor markers.  I went with bold colors for both cards and used the ROYGBIV order.  There are 8 colors in my rainbow card as that is the number of rows.  


I started in one corner of the stencil by adding color with my markers direct to the paper.  I outlined the arches of the rainbow and then scribbled in between the outlines.  Then, I used my Aqua-painter to move the color in the open area of the stencil.  You can add more ink from your marker if you want a darker color.


I then trimmed the panels and layered with bold colors of cardstock.  I then die cut words for each card.  For the rainbow, I used Taylored Expressions Celebrate Script and Backer.  On the hearts, I went with a new die I just received from Simon Says Stamp called Scripty Happy Birthday.  I then added a few white glitter enamel dots to the rainbow.


really like these two cards and I hope you do too!


I hope you will join me in making a card with some watercolor markers, a stencil and a sweet die.  Since today is the final day of camp, we will say our goodbyes and see you soon.  Who knows--maybe we will do this again in the fall and hope you will join us again!

It has been a great time--I so enjoyed making the other cards that my sweet counselors taught.  I love the new techniques and the great cards as a result!


Image/Sentiment:  Taylored Expressions Celebrate Script & Backer and Simon Says Stamp Scripty Happy Birthday Dies

Cardstock/Patterned Paper:  Strathmore Watercolor Paper White; Stampin' Up Real Red, Brilliant Blue, Daffodil Delight, Tempting Turquoise, Mango Melody

Ink:  Karin Brushmarker Pro Watercolor Markers

Accessories:  White Glittery Enamel Dots; A Colorful Life Designs Stencils--Bare Rainbow and Heart Fade


Tuesday, June 23, 2020

Using Karin Markers


It is a Tuesday in June and time for my A Card A Week Challenge!  This is my fourth card for the month, with the theme of using a new technique.  This card was using my new Karin Markers!  I love the way this card looks!

I used 7 markers and scribbled on a piece of watercolor cardstock.  I then spritzed with water and let everything dry.  I then cut with my a frame Taylored Expressions Smile Picture Perfect from the watercolor sheet.  I embossed the background with a Cuttlebug Wedding Suite-Diamonds.  I picked all primary colors for this cardstock, including the Taylored Expressions Flower in the middle
 

Here is the inside of my card with a strip cut from the watercolor paper


I really, really, like the look of these card and hope you do too.  I hope you will stop back next week to see what the last new technique for June!

Image/Sentiment:  Taylored Expressions Smile-Picture Perfect/Flower

Cardstock/Patterned Paper: White Watercolor Paper; Stampin' Up Daffodil Delight, Green Galore, Brilliant Blue

Ink:  Karin Brushmarker Pro

Accessories:  Cuttlebug Wedding Suite-Diamonds


Sunday, June 7, 2020

Karin Markers Test


This is my June Crafters of Faith card.  This is a great group that my friend Kelly started on SCS and we are well in our 4th year.  Jeanette is the hostess this month and gave everyone this challenge:

Scripture:  Philippians 4:13 - I can do all things through Christ who strengthens me.

Challenge:  This has long been one of my favorite Bible verses because it reminds me that I can do things in God’s power. I do not need to be fearful. God will equip me. For this month’s challenge, I’d like you to think of some paper-crafting technique, fold, or some other thing that you’ve been fearful of trying and let go of the fear and give it a try! (And no, that's not what I think Phil. 4:13 is speaking of, just in case you wondered.)

I typically do not try new things when stamping-however that is changing.  Since taking the Online Spring Card Camp 2, I have tried a few new techniques.  One thing that still does scare me a bit is watercoloring-as it does many stampers.  I do have all of the needed supplies-various types of watercolor paper and a few mediums to use-pencils, crayons, and markers.  But, a few weeks ago I bought a set of the newest "rage" in markers-Karin Brushmarker Pro Markers!  I am also participating in a weekly Zoom get together called Color and Connect with Kathy Racoosin and Lydia Fielder.  Both of those star coloring ladies and many of the other participants raved about the Karin Markers, so I had to try them.  And, this was one of my first attempts with them.  

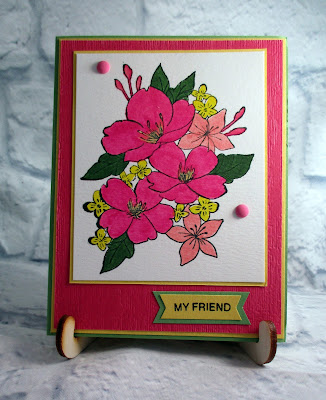
I picked pretty floral image from Memory Box-Open Studio called Thoughts and Prayers.  I stamped the flowers on Canson Watecolor Paper and colored them with my new Karin Markers.  I love the bright colors of the flowers.  I did a bit of shading with my aqua pen, but still need more practice.  The background is embossed with one of my favorite folders--Subtle Dynamic from Stampin' Up.  The sentiment is also from the same set and I used my Stampin' Up mini banner punch for the ends.  Pink Enamel Dots are the only embellishment. I really like the look of this card!


Here is the inside of my card with a strip of washi tape:


I hope Kelly and the others from the Crafters of Faith group like my card this month!  We are to post between the 7th and 10th of each month, so if you look on my sidebar, you may see other creations.  I know that there will be many posted in the COF thread on SCS too!  Kelly is up for our July challenge, so be sure to check back to see what I create!

Image/Sentiment:  Memory Box-Open Studio Thoughts and Prayers

Cardstock/Patterned Papers:  Canson Watercolor Paper;   Stampin' Up Mossy Meadow, Daffodil Delight, Melon Mambo

Ink:  Memento Tuxedo Black/Versafine Black

Accessories: 
 Karin Brushmarker Pro Markers; Pink Enamel Dots; Stampin' Up Mini-banner Punch; Subtle Dynamic Embossing Folder